All about the community of model railroading and rail enthusiasm

Fig. 4 – The sharp foreground relief draws you right into the action on Dave Jacob’s Serendip & Western RR

Fig. 5 – At the smallest apertures the depth of field extends almost equally on either side of the focus mark. Moving the focus point within this range allows you to shift the DOF.

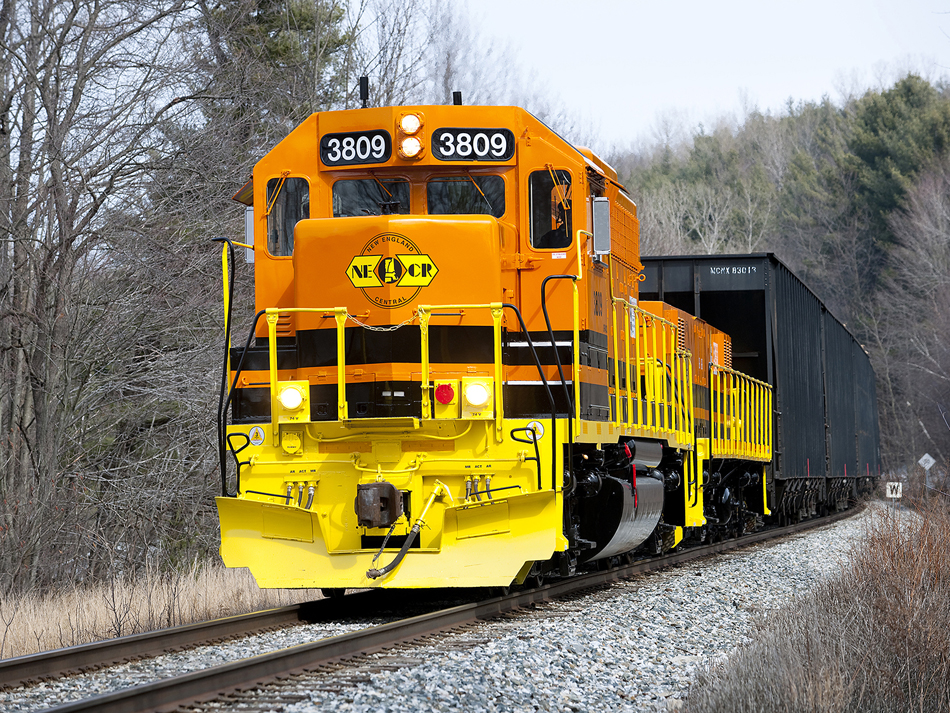
Fig. 6 – The DOP extends from the foreground to the background in this wide-angle shot of NYC 622 shuffling cars over the Garfield Ave. Bridge on the Sandy Harbor Terminal. Exposure: ½ sec. @F22, Focal Length 27mm

Fig. 7 – In this telephoto shot, the camera was moved back in order to keep the 622 and her load the same size in the frame. Notice the DOF has not changed. It still extends from the foreground to the background. Exposure ½ sec. at F22, Focal length 200mm (prime lens).
Story and Photos by Dennis Brennan
If you’re interested in having your photos published, magazines require high-resolution files. Note that your highest quality image files will be too large to submit by email. You’ll have to use a file sharing program like Dropbox (it’s free) or copy them to a CD, DVD or flash drive and then send via the USPS. Some publications have an FTP site that allows you to upload your files directly.
The ability to achieve proper depth of field (DOF) is often a determining factor in whether the magazine accepts the photo. Blurred foregrounds and backgrounds are usually not preferred.
While there is only one plane of critical focus in any photo, there is an area in front of and behind the actual point of focus that appears sharp – the depth of field. For any given camera format, depth of field depends on two things: the aperture and the distance from the camera to the subject (this equates to image magnification) – the smaller the aperture and the greater the distance, the greater the depth of field.
DOF is important for the obvious reason that the main subject needs to be in focus. Beyond that, good model railroad photography requires that everything from foreground to background appears to be in focus. That’s important because that’s how comparable photos of the real world look, and our brains are wired to see that way. Model shots that go against the grain spoil the illusion.
However, because of our close working distances in the model realm, it’s not always possible to keep the foreground, middle ground and background equally sharp. In that case, keeping the foreground and middle ground in focus and letting the background go soft is recommended. That comes across as natural while a noticeably out of focus foreground doesn’t (Fig. 4).
Here’s a tip when using your zoom lens: Focus on the closest point of your subject that needs to be sharp and note the footage indication on the lens. Then focus on the farthest point and note the footage indication. Now place your actual focus somewhere between these numbers. As long as you can see the numbers within the lens window, you’re in the kitchen.
For example, in Fig. 5 the near and far focus points were 2 and 4 feet, respectively, well within the window. Placing the actual point of focus at a little less than 3 feet yields a depth of field that falls within the 1.5-5 feet range. Moving the focus point toward 2 feet will shift the DOF toward the foreground.
Conversely, moving it toward 4 feet will shift the DOF toward the background. This is where the DOF preview button on your better DSLR cameras is a must. Pressing it closes the lens down to your set aperture, allowing you to see what’s actually in focus. (This example is presented as a guideline in explanation of the concept. Lenses vary, so for accuracy, always check your shot on your computer monitor.)
Ultimately, an illusion is created, and appearance is what matters. A nondescript foreground such as the surface of a street can be soft and no one will notice, but an out-of-focus railroad crossing sign, a tree or a line pole will be obvious. In that case, either remove the offending items or change the shot.
A common misconception is that a wide-angle lens has a greater depth of field than a telephoto lens. That’s because a wide-angle lens allows one to work closer with more DOF than a telephoto lens from the same position using the same aperture. However, if you keep your subject the same size in the shot, a telephoto lens will exhibit the same DOF.
To keep the image size or magnification the same when zooming in or using a telephoto lens requires the camera to be moved back, increasing the distance between camera and subject. The perspective or field of view changes but the range of acceptable focus does not. (Figs. 6, 7).